Stunning Acrylic Block Home Decor Projects
You can give your space a high-end feel. Acrylic decor creates instant modern entryway vibes. Your favorite photo can become a masterpiece. A family photo, a travel photo, or any photo looks great in acrylic. Even a simple photo can elevate your decor. Get inspired by these creative home decor projects.
DIY Acrylic Photo Frames
Custom Acrylic Bookends
Elegant Coaster Set
Modern Desk Organizer
Illuminated LED Sign
Miniature Terrarium
Decorative Serving Tray
Acrylic Wall Decor: Floating Shelves
Personalized Name Plate
Tiered Jewelry Stand
DIY Acrylic Photo Frames
Project Overview
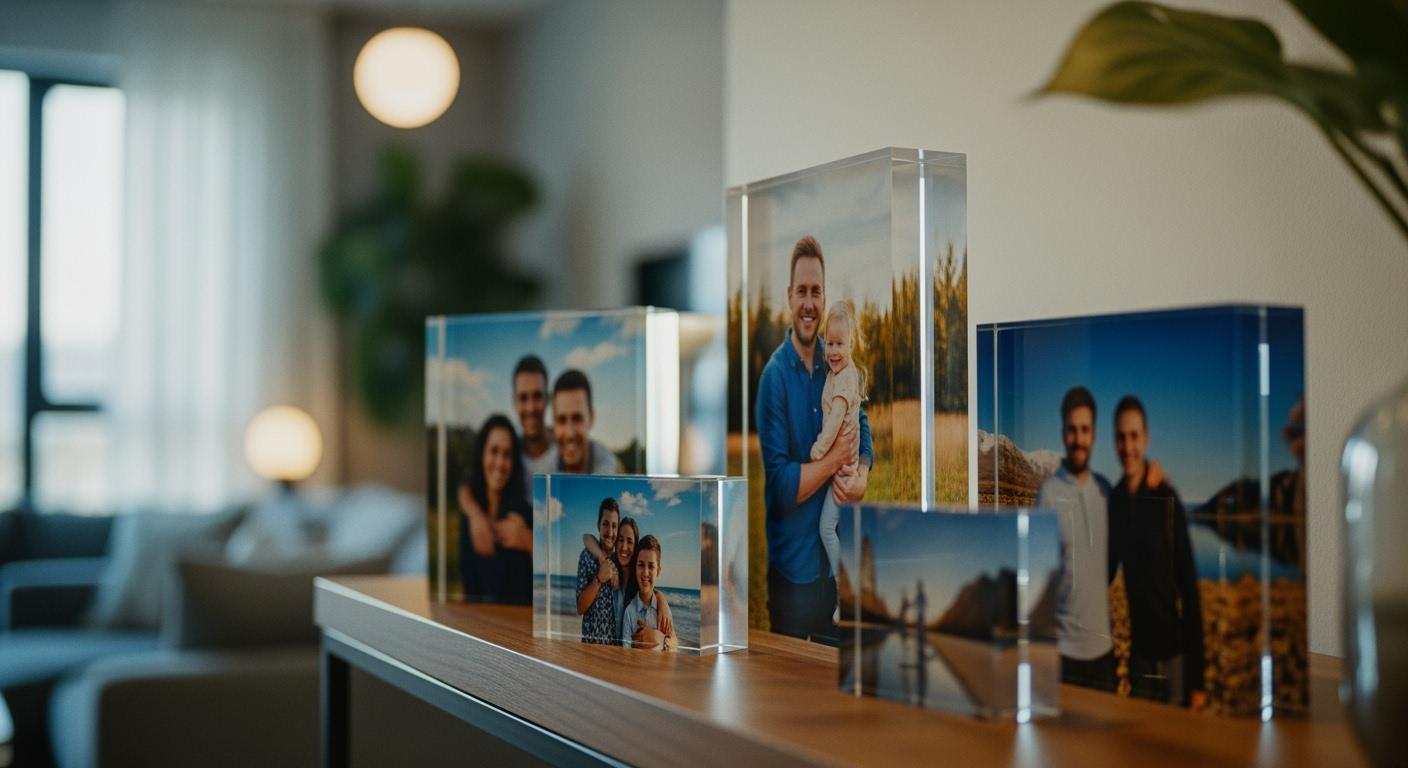
You can transform a favorite photo into a modern art piece. This is one of the most rewarding home decor projects. DIY acrylic photo frames give your memories a sleek, frameless look that seems to float. You can sandwich a cherished photo, thin artwork, or even delicate pressed flowers between two acrylic blocks. Imagine a light gray floral or bird pattern for a subtle touch. These acrylic photo frames are a fantastic decor option for any room. They are especially great for dorm rooms where space is limited but style is essential. This creative project lets you turn any photo into a masterpiece.
Required Materials
You will need just a few simple items for your acrylic photo frames.
Two acrylic blocks of the same size
Your chosen photo, trimmed to size
A soft, lint-free cloth
Optional: Pressed flowers or thin paper art
Step-by-Step Instructions
Creating your own acrylic photo frames is incredibly easy. You can achieve a professional look in minutes.
Prepare Your Blocks: First, you must clean both acrylic blocks. Use the soft cloth to wipe away any dust or fingerprints. A clean surface ensures your photo looks perfect.
Position Your Photo: Carefully place your photo onto one of the acrylic blocks. You can center the photo for a classic look. You can also place a smaller photo for a floating effect.
Assemble the Frame: Place the second acrylic block directly on top of the photo. Most blocks have small magnets in the corners. They will snap together securely, holding your photo in place. You now have a beautiful display piece. For a bigger statement, you can make an oversized acrylic photo frame with larger blocks.
Pro Tip: 💡 For a unique twist, use a black and white photo. The clear acrylic makes the monochrome image pop with stunning contrast.
Creating an Acrylic Frame Collage
You can take your decor to the next level. Create an amazing acrylic frame collage on your wall. Arrange several smaller acrylic photo frames in a grid or an organic cluster. This design choice builds a personal and dynamic floating memory wall. Each photo tells a part of your story. The collection of acrylic photo frames makes a powerful and stylish statement in your home.
Custom Acrylic Bookends
You can add a touch of personal flair to your bookshelves. Custom bookends are fantastic home decor projects that combine function and style. They keep your favorite novels organized while acting as miniature sculptures. This is your chance to get creative and design something that truly reflects your personality.
Design Overview
Your bookends can be anything you imagine. You can create a simple, elegant L-shape for a minimalist look. You can also explore more decorative designs. Let these ideas spark your imagination:
Personalized Initial Bookends: Craft bookends in the shape of your initials for a custom touch.
Themed Sets: Design a set based on a favorite concept, like an "Over the Rainbow" or "Glam Love" theme.
Geometric Shapes: Use bold shapes like stars, circles, or triangles for a modern art feel.
Materials List
You will need a few key supplies to bring your design to life.
Two L-shaped acrylic pieces or flat sheets to cut
A strong adhesive (acrylic cement is best)
A ruler and a non-permanent marker
Safety glasses and gloves
Optional: Vinyl decals, paint, or etching tools for decoration
Assembly Guide
Building your bookends is a straightforward process. Your careful work will result in a beautiful and sturdy product.
Prepare Your Pieces: First, ensure your acrylic pieces are clean and free of dust. If you are cutting your own shapes, measure and mark them carefully before cutting.
Apply the Adhesive: The right glue is crucial for a strong bond. You should use an acrylic cement, such as Weld-On. This type of adhesive actually melts the surfaces together, creating a single, solid piece.
Join the Pieces: Carefully apply the cement to the edge of one piece. Quickly press it against the other piece and hold it firmly in place. The bond sets fast, so you must work with confidence.
Let It Cure: Allow the bookends to cure completely according to the adhesive's instructions. This ensures maximum strength.
Important Tip: ⚠️ Acrylic cement is very thin and fast-acting. Practice on some scrap pieces first. This helps you get a feel for how the adhesive works before you assemble your final project.
Elegant Coaster Set
Project Concept
You can protect your furniture and express your artistic side at the same time. Creating a custom coaster set is one of the most satisfying home decor projects. These small squares of acrylic become miniature canvases for your imagination. You can design a set that perfectly matches your room's color scheme or theme. Explore vibrant patterns with alcohol inks, sleek graphics with vinyl decals, or a glossy, professional finish with a layer of clear resin. This creative project lets you craft functional art for your home.
Needed Supplies
You will need a few key items to begin your coaster project. Your specific list will change based on your chosen design method.
Square acrylic blocks (4x4 inches is a standard size)
A soft, lint-free cloth
Your decorative medium:
Epoxy resin kit (resin and hardener)
Alcohol inks and blending solution
Custom-cut vinyl decals
Mixing cups and stir sticks (for resin)
Safety glasses and gloves
Optional: A heat gun or kitchen torch
Helpful Hint: 💡 Some acrylic blocks come with built-in grid lines. These are perfect for achieving precise pattern alignment when you are working with vinyl or other geometric designs.
Crafting Instructions
Your journey to beautiful, custom coasters is simple. Follow these steps for a flawless result, especially when working with resin.
Prepare Your Workspace: Work on a completely level surface. This ensures your resin cures evenly without pooling. Make sure the area is clean and free from dust.
Apply Your Design: Clean your blocks first. Then, apply your vinyl decal or create your alcohol ink art directly on the acrylic surface. Let any ink dry completely.
Mix the Resin: If you are adding a top coat, you must mix your resin carefully. Measure the resin and hardener exactly as the instructions say. Stir slowly for 3-5 minutes, scraping the sides and bottom of your cup. This prevents unmixed resin from ruining your project.
Pour and Perfect: Pour the mixed resin slowly onto the center of the coaster. Let it spread toward the edges. To remove any bubbles that appear, pass a heat gun a few inches above the surface for a second or two.
Let It Cure: Cover your coasters to protect them from dust. Let them cure in a warm room, ideally around 75°F. They will be hard and ready to use in a few days.
Modern Desk Organizer
Organizer Design
You can conquer clutter and bring sleek style to your workspace. A custom desk organizer is a project that blends perfect function with your personal taste. You can design an organizer that fits your exact needs. Imagine these possibilities for your desk:
Minimalist Mail Sorter: Create a simple, elegant holder with two or three slots. It can hold your mail, important folders, or even an iPad.
Monitor Riser Shelf: Build a sturdy stand to elevate your screen. This improves ergonomics and gives you a new mini shelf for books. The open cubby underneath is perfect for sliding your keyboard away.
Organizer with a Drawer: Design a multi-part unit. You can have top sections for notebooks and a neat sliding drawer for smaller office supplies.
Material & Tool List
You will need a few key supplies to build your custom organizer.
Clear acrylic sheets
A strong adhesive like acrylic cement
A ruler and a non-permanent marker
Safety glasses and gloves
A fine-toothed saw for cutting
A soft, lint-free cloth
Construction Steps
You can build a beautiful and functional organizer with careful steps. Your focus will create a professional-looking result.
Measure and Mark: First, decide on the size of your organizer. Use your ruler and marker to draw the lines for the base, sides, and any internal dividers on your sheets.
Cut Your Pieces: Carefully cut along the marked lines. Always wear your safety glasses during this step. Clean all the cut pieces with a soft cloth to remove any dust.
Assemble the Base: Apply a thin line of adhesive to the bottom edge of a side wall. Press it firmly onto the base and hold it in place. The bond sets quickly, so work with confidence.
Add Compartments: You can create separate sections for your supplies. Glue smaller pieces vertically inside the organizer to act as dividers.
Let It Cure: Allow your finished organizer to cure completely. Follow the adhesive's instructions for the best results. This ensures a strong and durable final product.
Pro Tip: 💡 Before you start gluing your main project, practice on some scrap pieces. This helps you understand how fast the adhesive works.
Illuminated LED Sign
Project Overview
You can bring your favorite quote or design to life with a custom illuminated sign. This project turns a simple piece of acrylic into a glowing work of art. Your sign will add a vibrant, modern touch to any room. Imagine your name, a cool graphic, or an inspiring word shining brightly on your wall or desk. This project is a fantastic way to express your personality and create a truly unique focal point for your space. You will combine simple electronics with creative design to build something amazing.
Required Materials
You will need a few specific items to create your light-up masterpiece.
An acrylic sheet
An LED strip light kit (with power adapter and controller)
A wooden or plastic base to hold the sign and lights
An etching tool (like a Dremel or a craft knife)
A design template printed on paper
Tape and a soft cloth
Etching & Assembly Guide
You can create a professional-looking sign with careful work. The magic happens when light travels through the lines you etch.
Etch Your Design: First, tape your printed design template to the back of the acrylic sheet. Use your etching tool to carefully trace the design onto the front. For highly precise and intricate patterns, laser etching is an excellent method that creates clean lines without damaging the material.
Prepare the Base: Create a slot in your base that is wide enough to hold your sign. Place the LED strip inside this slot, making sure it faces upward.
Assemble the Sign: Clean your etched sheet with a soft cloth to remove any dust. Carefully slide the bottom edge of the sheet into the slot in the base, directly over the LED strip.
Connect the Power: Plug the LED strip into its controller and connect the power adapter. Your design should now light up beautifully. You can use the remote to change colors and create different lighting effects.
Safety First! ⚠️ Your safety is the top priority. Always use the power adapter that came with your LED kit to prevent overheating. Ensure your sign has good ventilation and is not placed near flammable materials. Keep all power cords and cables tidy and out of reach.
Miniature Terrarium
Design Concept
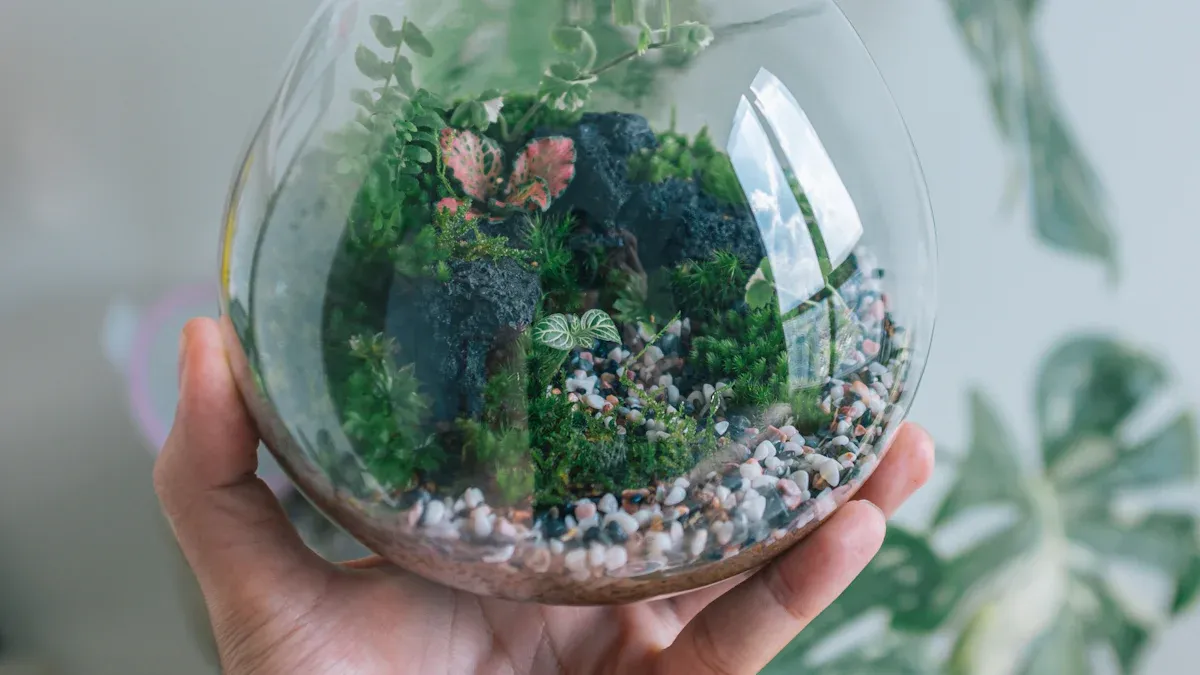
You can create a tiny, living world inside a clear container. A miniature terrarium brings a touch of nature indoors. It is a beautiful, low-maintenance piece of living art for your desk or shelf. You can choose plants that fit your style and the terrarium's conditions. Air plants and succulents are excellent choices for open terrariums. They love good airflow and drier conditions.
Consider these amazing plant options for your design:
Succulents: Varieties like Echeveria and Haworthia offer beautiful shapes and colors.
Air Plants (Tillandsia): These plants do not need soil. You can place them on rocks or wood.
Ionantha: A small, easy-care plant perfect for beginners.
Bulbosa guatemala: This plant looks like a tiny sea creature.
Tectorum: It has a silvery color and looks like a little snowball.
Supplies List
You will need a few items to build your miniature garden.
A clear acrylic box or container
Small plants (succulents or air plants)
Small rocks or LECA for drainage
A barrier layer like sphagnum moss or mesh
Activated charcoal
Terrarium soil mix
Decorative elements like sand, small stones, or driftwood
Building Instructions
You can assemble your beautiful terrarium in just a few steps. Your careful layering will create a healthy home for your plants.
Add the Drainage Layer: First, place a layer of lava rock or LECA at the bottom. This space allows excess water to drain away from the plant roots.
Place the Barrier: Next, add a thin layer of sphagnum moss or a mesh screen. This barrier stops soil from falling into the drainage area.
Include the Charcoal: Sprinkle a thin layer of activated charcoal. This layer helps keep the water and soil fresh.
Add the Soil: Now, add your substrate or soil layer. Make it deep enough for your plant's roots to grow.
Plant and Decorate: Finally, place your plants inside. You can add decorative rocks or sand to complete your miniature landscape.
Helpful Tip: 🌿 You can make a great soil mix for your terrarium. Combine two parts coco coir, two parts orchid bark, one part worm castings, and one part black sand. This mix provides great drainage and nutrition.
Decorative Serving Tray
Tray Overview
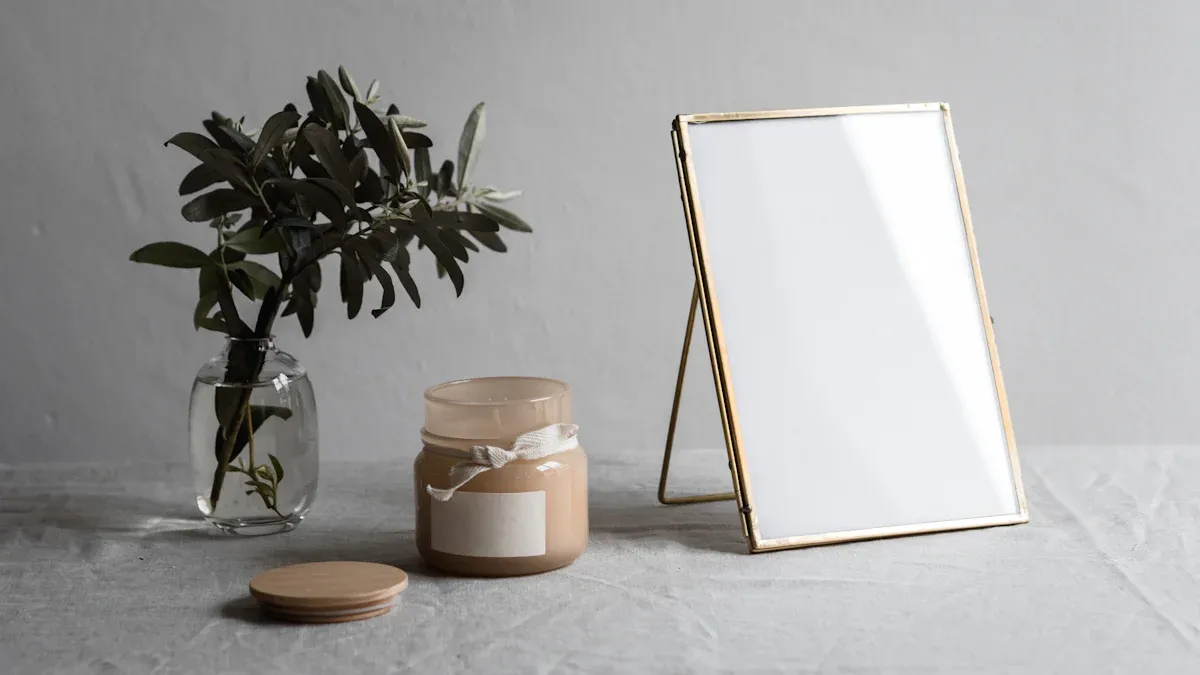
You can create a stunning centerpiece for your coffee table or kitchen counter. A custom serving tray is a project that combines elegance with everyday usefulness. You can design a tray that serves drinks with flair or organizes your favorite decor items. Imagine a clear, modern tray holding candles, a small plant, and your remote controls. This project lets you build a high-end decor piece that is perfectly suited to your home's style. You will craft an item that is both beautiful and incredibly practical.
Needed Materials
You will need just a few items to build your beautiful new tray.
A rectangular acrylic sheet (your desired tray size)
Two decorative handles (like gold or black metal pulls)
Screws that fit your handles
A power drill with a bit sized for your screws
A non-permanent marker and a ruler
A soft, lint-free cloth
Step-by-Step Assembly
You can assemble your elegant tray with a few simple, careful actions. Your focus will result in a professional-quality piece you can be proud of.
Design Tip: 🎨 Before you start, place your handles on the sheet to see how they look. This helps you visualize the final product and choose the perfect placement.
Position the Handles: First, eyeball where you want the handles to go. Place them on the tray's surface for a visual check.
Mark Your Holes: Use your marker to make two small dots where you will be drilling for each handle. A ruler helps you make sure they are perfectly even.
Drill the Holes: Carefully drill through the marks you made. Go slowly to prevent the material from cracking.
Attach the Handles: Secure the handles with your screws. It is crucial to use screws of the correct length. The original screws with the handles might be too long, so you may need to find shorter ones for a tight, secure fit.
Once the handles are attached, your beautiful new tray is ready to use and display!
Acrylic Wall Decor: Floating Shelves
Project Description
You can transform your walls into a modern display with floating shelves. This acrylic wall decor project creates a clean, minimalist look. Your favorite items will appear to float in mid-air. You can showcase small plants, picture frames, or treasured collectibles. Choosing the right shelf thickness is key to a successful display.
Light Loads (5-10 lbs): A thickness of ¼” to ⅜” is perfect for small decorations or cosmetics.
Medium Loads (10-20 lbs): Use a ½” to ¾” thick shelf to support books or kitchenware.
Heavy Loads (20-30 lbs): A thickness of ¾” to 1” provides excellent stability for heavier equipment.
This project lets you design a storage solution that is both beautiful and strong.
Installation Materials
You will need the right tools to mount your shelves securely. Gathering your supplies first makes the process smooth and easy.
Your acrylic shelf and floating shelf brackets
A stud finder
A handheld drill and screws
Wall anchors (if you cannot drill into a stud)
A tape measure
A level (laser or handheld)
A non-permanent marker
Mounting Guide
You can install your shelves perfectly with a few careful steps. Your attention to detail will create a stunning result.
Find Your Studs: Use a stud finder to locate the wall studs. Securing your shelf to studs provides the best support.
Mark Your Placement: Decide where you want your shelf. Make a small mark for your first drill hole. Use your level to extend a straight line from this point. Double-check your measurements before you drill.
Install the Brackets: Drill your pilot holes and attach the brackets to the wall. Screws must be long enough to go securely into the studs. If you cannot use a stud, you must use a wall anchor for stability.
Mount the Shelf: Slide your shelf onto the brackets. Step back and admire your new piece of functional acrylic wall art.
Pro Tip: 💡 If your bracket holes do not line up with the studs, you can drill new holes in the metal bracket. This simple trick helps you use more studs for an even sturdier installation.
Personalized Name Plate
Design Overview
You can make a statement before you even say a word. A personalized name plate is your chance to introduce your style to your office or front door. This project lets you create a piece that is uniquely you. What mood do you want to set? You can choose elegant script fonts for a touch of sophistication or bold block letters for a modern, professional feel.
Think beyond just text. You can elevate your design with creative details.
Etch delicate floral or geometric patterns into the surface.
Combine your name plate with wood or metal for a stunning mixed-material look.
Add small hooks for your keys to blend style with function.
Install LED lights behind your sign for a cool, glowing effect at night.
Required Supplies
You will need a few key items to bring your vision to life.
A blank name plate
Custom vinyl lettering or an etching tool
A ruler and a soft cloth
Mounting hardware (like standoffs or adhesive)
For vinyl: Transfer tape and a squeegee tool
Creation & Mounting Steps
You can achieve a flawless, professional look with these simple steps. Your careful work will create a beautiful final product.
Apply Your Design: For a perfect vinyl application, you can use the wet method. First, clean your name plate. Lightly mist the surface with water mixed with a tiny drop of soap. Apply your vinyl decal, and then use a squeegee to smooth it down. This pushes out water and air bubbles for a perfect bond.
Mount Your Plate: You have several great options for displaying your work. For a sleek, floating look, you can use stainless steel standoffs. These metal posts attach to the wall and hold your sign a short distance from the surface. For a simpler approach, you can use strong adhesive strips or even partition pins to hang it on a cubicle wall.
Mounting Tip: 💡 You can buy DIY kits that include the plates and two stainless steel standoffs. You just print your design, place it between the plates, and mount the whole thing for a clean, professional appearance.
Tiered Jewelry Stand
Stand Design
You can finally untangle your necklaces and organize your earrings with a beautiful, custom stand. This project lets you create a functional piece of art that keeps your favorite accessories neat and accessible. Your design can be simple or complex, perfectly matching your collection and style.
Imagine these elegant options for your space:
Acrylic Risers: You can use versatile risers to create a multi-level display. This design elevates your jewelry, making every piece easy to see and grab.
Tiered Countertop Trays: You can build a beautiful stand with several stacked trays. This is perfect for organizing rings, bracelets, and other small items on your dresser.
Materials List
You will need a few key tools and materials to build your stand.
Acrylic sheets or pre-cut circles/squares
Drilling machine with appropriate drill bits
Screws and nuts
Hand tools (screwdriver, wrench)
Tape (for marking)
Auxiliary materials like rubber pads for stability
Assembly Instructions
You can build a sturdy and beautiful stand with these careful steps. Your focus will create a professional-looking result.
Mark Your Holes: Place tape on the acrylic where you plan to drill. This simple trick helps prevent cracking. Mark your drill locations on the tape.
Drill with Care: Select the correct drill bit for your screws. Drill slowly and steadily, using stable pressure. Avoid pushing too hard to prevent damage.
Connect the Tiers: You can now assemble your stand. Use screws and nuts to connect the pieces. Tighten them with a wrench or screwdriver for a secure connection.
Check for Stability: After assembly, check if your stand is balanced. You can add small rubber pads to the bottom to prevent wobbling and protect your furniture.
Pro Tip: 💡 Do not over-tighten the screws. A snug fit is all you need. Over-tightening can stress the material and cause it to crack.
You have seen how acrylic can elevate your space. These home decor projects prove you can create stunning, personalized decor. Your creativity is the only limit. You can build beautiful pieces that reflect your unique style.
Now it's your turn! ✨ Choose a project that inspires you. Share your finished masterpiece on social media with the hashtag #MyAcrylicCreation to join our creative community!
FAQ
How do I clean my new acrylic decor?
You can easily keep your projects looking brilliant. Use a soft, lint-free cloth with mild soap and water. Gently wipe the surface to remove dust and smudges. You should avoid harsh chemicals or glass cleaners. They can damage the beautiful, clear finish of your creations.
Can I fix a scratch on my acrylic project?
Yes, you can restore your project's flawless shine. Minor scratches often disappear with a special acrylic polish kit. You can find these kits online or at hardware stores. Following the kit's instructions will help you bring back that crystal-clear look to your amazing decor piece.
What is the best glue for joining acrylic pieces?
You need a strong bond for a lasting creation. Acrylic cement is the best choice for your projects. It chemically welds the pieces together, creating a single, solid unit. This gives you a professional and incredibly durable result that you can be proud of for years.
Where can I find acrylic blocks and sheets?
You can find your materials in several places. Online stores like Amazon or specialty plastic retailers offer a wide selection of sizes. You can also check with local plastic suppliers in your area. They can often cut sheets to your exact custom dimensions.
Shopping Tip: 🛍️ Always check the thickness of the acrylic before you buy. This ensures it is strong enough for your specific project, like a sturdy floating shelf or a delicate jewelry stand.
See Also
Elevate Your Modern Home Decor with Stylish Acrylic Trays in 2025
Ten Ingenious Ideas for Styling Small Acrylic Trays in Your Home
Understanding Acrylic Blocks: Definition, Key Features, and Practical Applications
Ten Chic Methods to Revitalize Your Spaces Using Acrylic Trays
Organize Your Tabletop Elegantly with Spacious Large Acrylic Trays