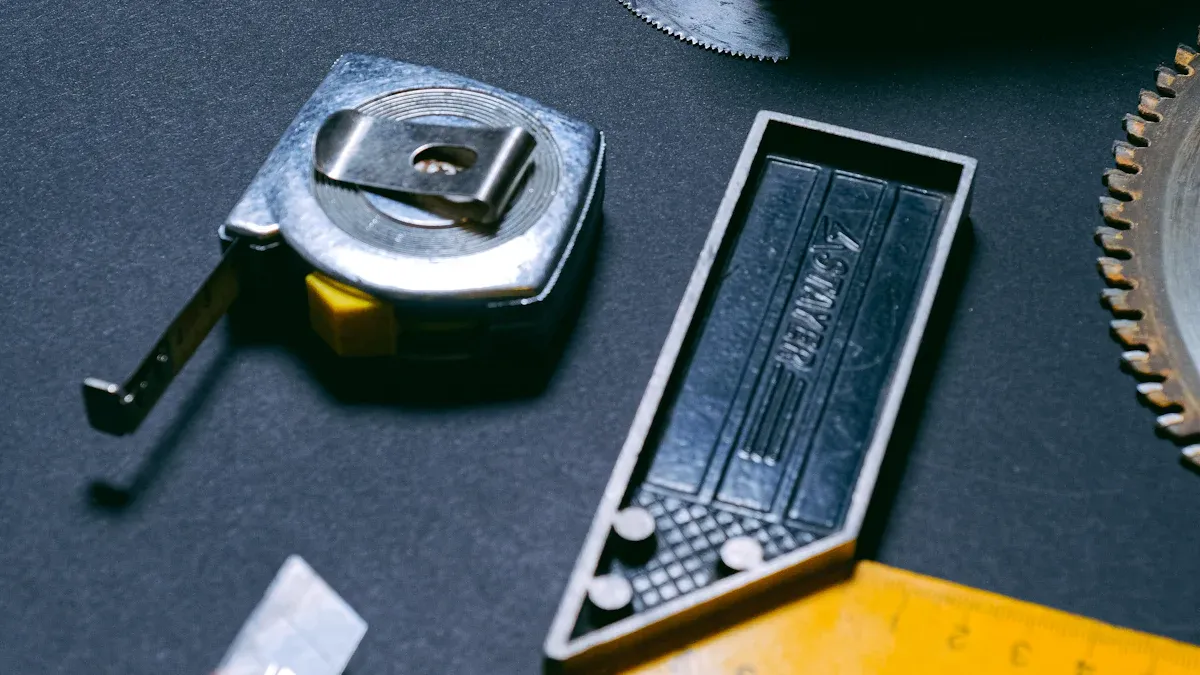
How to cut perspex acrylic sheet

To cut perspex, people use tools like scoring knives, saws, or lasers. Safety is very important. They wear goggles, gloves, and masks to stay safe from fumes and dust. TOYIN sells good acrylic products and gives expert help. The table below lists common safety problems:
Safety Incident Type | Description |
|---|---|
Fumes from Laser Cutting | Laser cutting makes a lot of fumes that must be collected and handled. |
Dust from Cutting | Cutting acrylic makes dust, so you need to be careful. |
General Safety Precautions | You must wear goggles, gloves, and masks for safety. |
Key Takeaways
Always wear safety gear like goggles, gloves, and masks when cutting perspex to protect against dust and fumes.
Choose the right cutting tool based on the thickness of the acrylic sheet for the best results.
Use painter's tape along the cutting line to prevent chipping and ensure smooth edges.
Tools to Cut Perspex
Picking the right tool is important when cutting perspex. TOYIN Acrylic Products Co., Ltd. sells strong acrylic sheets. These sheets work with many cutting tools. Their website shows sheet types and thicknesses. This helps people choose the best tool for their job.
Scoring Knife Method
A scoring knife is good for thin sheets. It works best for sheets up to 3 mm thick. The table below shows how thickness changes cutting results:
Thickness (mm) | Cutting Effectiveness |
|---|---|
1 to 3 | Best for knife cutting |
4 | Can work but needs more tries |
Above 4 | Not a good idea |
Here are steps to cut perspex with a scoring knife:
Wear gloves and safety glasses.
Try cutting on scrap pieces first.
Use a straight edge to guide your knife.
Score the sheet with a sharp blade.
Put the sheet on a flat surface.
Press down hard, but only cut the top layer.
Score from one side to the other.
Put the sheet on the edge of a table. Line up the score and snap it with steady pressure.
Sand the edges if they are rough.
Tip: Use a scoring knife for sheets less than ¼” thick. Practice on scrap pieces to avoid mistakes.
Power Saw Options
Power saws cut perspex fast and neatly. People use table saws, jigsaws, and circular saws for different shapes. The table below lists saws and their good points:
Type of Saw | Advantages |
|---|---|
Table Saw | Stays steady and cuts straight; needs a fine-toothed blade. |
Jigsaw | Good for curves; fine-toothed blades help stop chipping. |
Circular Saw | Quick for straight cuts; use blades made for plastics. |
Picking the right blade is important. The table below shows blade sizes and tooth numbers:
Blade Diameter | Number of Teeth |
|---|---|
10’’ | 60, 80 |
12’’ | 60, 80, 100 |
14’’ | 60, 80, 100 |
A 10-inch blade with 80 teeth works for most jobs. Carbide-tipped blades with triple-chip design make cleaner cuts and stop chipping.
Note: Put tape on the cutting line before using a jigsaw. This helps stop chips and keeps the edge smooth.
Laser Cutting
Laser cutting gives very exact cuts and smooth edges. Many people use lasers for fancy designs or shiny finishes. The table below shows laser cutting’s good and bad sides:
Benefits of Laser Cutting | Limitations of Laser Cutting |
|---|---|
Very accurate | Can’t cut thick sheets |
Smooth, shiny edges | Makes harmful gases |
Wastes little material | Uses a lot of energy |
Flexible for many shapes | Costs more at first |
Fast and efficient | N/A |
Laser cutting is best for custom shapes and pro projects. TOYIN uses advanced machines for laser cutting. Their acrylic sheets are great for designers and makers.
Safety Equipment
Safety is always important when cutting perspex. The table below lists gear you should wear:
Safety Equipment | Purpose |
|---|---|
Safety Goggles | Keep eyes safe from dust and bits. |
Dust Mask | Stops acrylic dust from getting in your lungs. |
Protective Gloves | Protect hands from cuts and scrapes. |
Reminder: Always wear goggles, gloves, and a dust mask. These keep you safe from dust, sharp edges, and fumes.
People can cut perspex with simple tools or advanced machines. TOYIN’s acrylic sheets work with all these methods. Users can pick what works best for them.
Cutting Techniques and Edge Finishing
How to Cut Perspex Without Cracking
Many people worry about cracks when they cut perspex. Cracking happens because of heat, pressure, or bending. Experts share several tips to help avoid these problems:
Use a fine-toothed blade. This type of blade puts less stress on the acrylic and helps prevent cracks.
Clamp the sheet tightly. Securing the material stops vibrations that can cause cracks.
Cut slowly and steadily. Moving too fast creates heat, which leads to stress and cracking.
For thin sheets, score with a utility knife and snap along the line. This method gives a clean break.
Keep the acrylic cool. Water or compressed air can help lower the temperature during cutting.
People often make mistakes when they cut perspex. They might use too much force or cut too quickly. Heat from cutting or drilling can cause stress and cracks. Tight fittings and bending also create problems. Cutting with the wrong tools can weaken the edges. To avoid these mistakes, use painter’s tape along cut lines, keep a steady pace, and follow the manufacturer’s guidelines.
Tip: Always check that the blade is sharp and clean before starting. Dull blades can cause rough edges and cracks.
Finishing Edges (Sanding & Polishing)
After you cut perspex, the edges may look rough or cloudy. Sanding and polishing make the edges smooth and clear. Here’s how people get the best results:
Start with coarse grit sandpaper, like 180 grit. This removes saw marks and rough spots.
Move to finer sandpaper, such as 320 or 360 grit. This step smooths out scratches.
Use very fine sandpaper, like 1200 grit or higher, for a polished finish. Some people use a finishing compound for extra shine.
People use different methods to polish edges:
Wet and dry sanding works well and does not need special tools.
Flame polishing can make curved edges shiny, but it takes skill and can cause crazing.
Buffing wheels give a glossy finish. Handle them carefully to avoid melting the acrylic.
Some people use extra steps for a crystal-clear edge. They start with 400 grit, then use 800, 1500, and even 3000 grit sandpaper. Each step removes scratches and makes the edge clearer.
Note: Always sand in one direction and keep the surface wet to avoid scratches.
Cleaning Up After Cutting
Cutting perspex leaves dust and small bits behind. Cleaning the sheet keeps it looking new and prevents scratches. People use safe cleaning agents and gentle methods:
Cleaning Agent | Description |
|---|---|
Warm water with mild dish soap | Safe and effective for cleaning perspex acrylic sheets. |
Specialized plastic or acrylic cleaner | Cleans without damaging the surface. |
Non-abrasive, ammonia-free acrylic cleaners | Prevents scratches and clouding. |
Avoid ammonia, alcohol, or aromatics | These can damage the acrylic material. |
To clean perspex after cutting, follow these steps:
Rinse the sheet with lukewarm water to remove loose debris.
Use a soft, lint-free microfiber cloth with mild soap and water.
Gently wipe the surface. Avoid pressing too hard.
Rinse with clean water to remove soap.
Dry with a soft cloth to prevent water spots.
People should avoid abrasive cleaners, sponges, and paper towels. These can scratch the surface. Regularly using a plastic cleaner or protectant helps keep the finish bright. Keep acrylic objects away from rough surfaces and tools.
Some people wonder what to do with leftover pieces. Acrylic is recyclable, but only at special facilities. Most local recycling programs do not accept acrylic. PMMA scrap can be recycled and made into new sheets. Acrylic is not biodegradable, so proper disposal matters.
Tip: Store offcuts for future projects or take them to a specialty recycling center.
People who cut perspex and finish the edges carefully get the best results. Clean edges and surfaces make every project look professional.
Cutting perspex acrylic sheets works best when people follow these tips:
Wear safety gear and work in a ventilated space.
Pick the right tool for the sheet thickness.
Use painter’s tape for smooth edges.
Sand and polish for a clear finish.
TOYIN offers high-quality acrylic products and custom solutions for every project.
FAQ
Can you cut perspex with regular scissors?
No, scissors do not work for perspex. They crack or break the sheet. Use a scoring knife or saw for best results.
What is the safest way to cut thick acrylic sheets?
Use a table saw with a fine-toothed blade.
Clamp the sheet tightly.
Wear goggles and gloves for protection.
How do you get a clear edge after cutting perspex?
Step | What to Do |
|---|---|
Sand | Start with coarse grit |
Polish | Use a buffing wheel |
Clean | Wipe with a soft cloth |