Brief a Manufacturer for Supermarket Displays
A detailed manufacturing brief is the most vital document for your successful custom display project. You use this brief to brief a manufacturer clearly. A strong brief prevents costly errors. This brief ensures your convenience product is perfect for every store, store, store, store, store, store, store, store, store, and store.
Get Started Now 📝 Download our free Supermarket Display Briefing Template. This tool will help you structure your project brief.
How to Brief a Manufacturer: Core Details
This first section of your brief sets the stage for the entire project. You provide the high-level context that a manufacturer needs to understand your goals. A good fixture brief starts with these core details. Effective convenience store management depends on clear initial communication.
Project Overview and Objective
You must first define the "why" behind your display. What is its primary purpose in the store? Your objective should be specific and measurable. Vague goals lead to disappointing results. A strong brief clearly states what success looks like for your convenience product.
Defining a Clear Objective:
- Specific: Your objective should precisely detail what you will achieve. For example, instead of "increase sales," you could aim to "launch a new countertop display in every store to boost candy sales."
- Measurable: You need a way to track success. A measurable goal would be: "Increase sales of the featured product by 15% in each store within the first quarter of deployment." This provides a clear target for convenience store management.
Quantity and Rollout Schedule
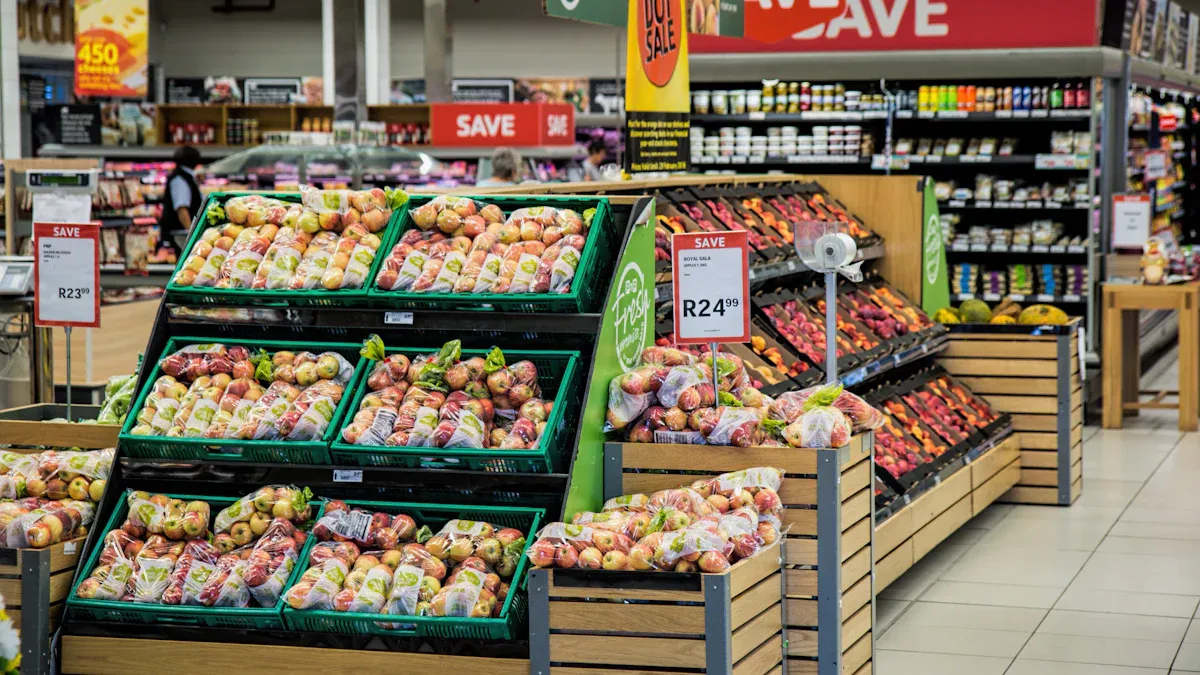
Next, you will specify the number of displays you need and your timeline. This information directly impacts pricing and production planning. Ordering larger quantities often lowers the per-unit cost. For custom displays, manufacturers may require minimum orders of 200-350 units to justify tooling costs. Be realistic about timing. Domestic manufacturing can take around 7 weeks, while imported options may take 14-16 weeks. This detail is vital for convenience store management and ensuring every store receives its display on time for maximum convenience.
Budget Constraints and Targets
You must provide a clear budget. This helps the manufacturer propose solutions that are financially viable. Without a budget, you may receive proposals that are too expensive or that miss the mark on quality. The cost of a display for your convenience product varies greatly. This is a key part of how to brief a manufacturer. Your convenience store management team will appreciate this foresight.
| Display Type | Material Focus | General Cost Implication |
|---|---|---|
| Temporary | Corrugated Cardboard | Most cost-effective for short-term use. |
| Semi-Permanent | Durable Cardboard, Plastic | Mid-range cost for longer campaigns. |
| Permanent | Metal, Wood, Acrylic | Highest initial investment for long-term use in a store. |
Key Stakeholder Contacts
Finally, your brief should list the main points of contact for the project. This prevents communication delays. Include names, titles, and contact information for the project lead, the design approver, and the finance contact. When you brief a manufacturer, this simple step ensures questions go to the right person quickly. A complete fixture brief makes the process a convenience for everyone involved, especially for convenience store management. This brief is your roadmap to a successful store display.
Technical and Design Specifications

This section of your brief is the most critical part. You will detail the exact physical attributes of your display here. Precision prevents production errors and guarantees the final unit functions perfectly in every store. A detailed brief ensures a smooth process for maximum convenience.
Overall Dimensions and Tolerances
You must provide the exact dimensions for your unit. Specify the overall height, width, and depth. These measurements dictate the display's footprint in the store. You should also define acceptable tolerances. Tolerances are the small, allowable deviations from a stated dimension.
Why Tolerances Matter Custom acrylic displays, for example, have slight thickness variations from the manufacturing process. An experienced partner anticipates this. Your brief should state a tolerance range, like +/- 0.5mm, to ensure all parts fit together correctly. This simple step is a mark of quality control and provides convenience for assembly.
Material and Finish Requirements
Your choice of materials directly impacts the display's look, durability, and cost. You need to be specific in your brief. If you want acrylic, specify the type. Cast and extruded acrylic have different properties that affect performance in a store.
| Feature | Cast Acrylic | Extruded Acrylic |
|---|---|---|
| Clarity | Offers superior, glass-like clarity. | Good clarity but more prone to scratching. |
| Durability | Harder and more scratch-resistant for high-traffic areas. | Softer and more sensitive to some chemicals. |
| Cost | Higher initial investment. | More cost-effective for large-scale projects. |
| Best For | Premium custom pop displays and cosmetic units. | General POS displays and protective barriers. |
For finishes, you must demand brand consistency. Require exact Pantone or RAL color codes for all painted or printed elements. This ensures your brand colors are accurate across every single store. For high-traffic floor-standing units, consider durable finishes like Luxury Vinyl Tile (LVT) or epoxy coatings to resist wear and tear. This level of detail provides convenience for long-term maintenance.
Branding and Graphics Placement
Your brief must clearly define all branding elements. You should specify the exact size and placement of logos and marketing messages. Provide a separate artwork file for all graphics. You also need to state the preferred printing method. Different materials require different techniques for the best result.
| Printing Method | Best For These Materials |
|---|---|
| LED UV Printing | Plastics, Wood, Metal |
| Laser Engraving | Metal, Wood |
| Screen Printing | Fabrics, Various Flat Surfaces |
| Vinyl Application | Most Smooth Surfaces |
Providing this information in your brief helps the manufacturer quote accurately and produce a visually perfect unit for each store. This attention to detail offers convenience to your marketing team.
Structural and Security Needs
You must define how strong your display needs to be. This is its load capacity. To determine this, you should:
- Assess the Products: List every item the display will hold.
- Calculate Total Weight: Weigh all the products and add a 10-20% buffer for safety.
- Specify in the Brief: Clearly state the required load capacity (e.g., "Each shelf must support 25 lbs").
Security is another vital consideration, especially for high-value merchandising. Your brief should list any required anti-theft features. These features provide convenience by reducing shrink in the store.
- Secure Mounts: These hold items like electronics firmly with a strong tether and an alarm.
- Locking Cases: A transparent case with a lock allows visibility while preventing direct access.
- Retractable Tethers: These allow customers to handle a product while keeping it secured to the display.
These features protect your inventory and are essential for a successful store program.
Integrated Component Specs
Modern visual merchandising solutions often include electronics or mechanical parts. Your brief must list every integrated component. This ensures compatibility and proper installation. This planning provides convenience for store staff.
Example Component List:
- LED Lighting: Specify color temperature (e.g., 4000K Neutral White) and brightness.
- Digital Screens: List the screen size (e.g., 15-inch), orientation (portrait/landscape), and if it requires touch capability.
- Mechanical Parts: Include details for any locks, hinges, or drawer slides.
A complete list in your custom display brief prevents surprises and ensures the manufacturer delivers a fully functional unit ready for any store. This foresight offers convenience and avoids delays.
Logistics and Compliance
Your display is designed, but how does it get from the factory to the store floor? This section of your brief covers the crucial logistics that ensure a smooth rollout. Proper planning here provides immense convenience for your entire team.
Packaging and Protection
You must specify how you want your displays packaged. This choice impacts shipping costs and assembly time. Your brief should state your preference clearly.
Packaging Options for Your Store:
- Flat-pack (Knock-down): Displays are shipped in parts. This method is often cheaper to ship and reduces the risk of damage. It offers great convenience for transport.
- Fully Assembled: Displays arrive ready for placement. This saves time at the store but can be more expensive to ship.
Your brief must also detail protective materials like custom foam inserts. For palletized shipments, require labels with unique barcodes on at least two sides. Ensure labels are placed outside any plastic wrap for easy scanning. This detail is vital for efficient convenience store operations.
Assembly and Installation
A display that is difficult to assemble creates problems for every store. For maximum convenience, your brief should include a complete list of all required accessories. This includes items like assembly tools, screws, magnetic strips, and even a small number of spare parts. A clear plan here helps convenience store management teams execute a flawless launch.
Shipping and Delivery
Define your shipping strategy to avoid costly surprises. Your manufacturer can help you choose the best method for your rollout.
| Shipping Method | Best For |
|---|---|
| LTL (Less Than Truckload) | Smaller rollouts to multiple store locations. |
| FTL (Full Truckload) | Large, single shipments to a distribution center. |
For international projects, your brief must demand compliance with shipping standards. For example, wood pallets must be ISPM-15 certified to prevent the spread of pests. Using plastic pallets is another way to ensure convenience and avoid customs delays. Good planning supports smooth convenience store operations.
The Final Convenience Store Checklist
Your display must comply with store standards and legal requirements. A final convenience store checklist confirms readiness. Your design should adhere to ADA guidelines, keeping products within a reach range of 15 to 48 inches from the floor. This ensures every customer has a positive experience in your store. A good convenience store checklist is a tool for success.
Your convenience store checklist should also verify that the display matches the planogram. This is a key task for convenience store management. A daily convenience store checklist helps maintain standards. Effective convenience store operations depend on this final check. Using a convenience store checklist ensures every detail is perfect. Your daily convenience store checklist confirms this. The convenience store checklist is non-negotiable for convenience store management. This convenience store checklist provides ultimate convenience. The daily convenience store checklist is a must for every store. Your convenience store management team will thank you for this convenience store checklist. This final convenience store checklist guarantees a successful program for each store.
Essential Supporting Documentation
Words can only describe so much. You must provide supporting documents to give your manufacturer a complete picture. These visuals eliminate guesswork and provide ultimate convenience for the production team. This part of your brief ensures the final product matches your vision for every single store.
Annotated 2D or 3D CAD Drawings
Technical drawings are the blueprint for your display. You should provide detailed CAD (Computer-Aided Design) files. A 3D model offers great convenience because it allows the manufacturer to see the design from all angles, preventing errors before production starts. This is a huge convenience for any store rollout. For maximum clarity, your 2D drawings should include:
- Multiple views (orthographic, isometric)
- Precise dimensions and tolerances
- Annotations and notes for the manufacturer
- Specific line types to show different features
These details provide convenience for the engineering team and ensure every part fits perfectly for each store.
Reference Photos and Mood Boards
You need to show the manufacturer your brand's aesthetic. A mood board is the perfect tool for this. It is a collage of images, colors, and textures. It communicates the look and feel you want to achieve in the store. Think of mood boards used for fashion brands or restaurants. They capture a vibe and a target audience. Your mood board does the same for your product in the store environment. This provides convenience by aligning the creative vision. This visual guidance is a convenience for every store designer.
Physical Material Samples
You cannot rely on a computer screen for color and texture. Digital colors look different on physical materials and under different lighting. This is why you must provide physical samples.
Why Samples Are Essential A screen emits light, while a real material in a store absorbs it. Sending a physical sample is the only way to guarantee color accuracy. It offers convenience for quality control and ensures your brand standards are met in every store.
This step provides convenience for matching finishes and is a critical checkpoint. It confirms the final look and feel for each store, offering convenience to your brand team.
A good fixture brief provides convenience for every store. It covers project scope, technical details, and logistics for maximum convenience. You can brief a manufacturer with our template for total convenience. This brief offers convenience for each store. You brief a manufacturer for the convenience of your store. This brief ensures convenience for every store, store, store, store, store, store, store, store, and store.
Start Your Project with Confidence 🚀 Download our template for ultimate convenience and store success.
FAQ
How does a detailed brief improve my project?
A strong brief provides total convenience. It ensures the manufacturer understands your vision for each store. This clarity prevents errors, saves money, and offers convenience for your team. Better planning leads to better customer service in every store, offering convenience for every shopper in your store.
What is a typical minimum order for custom displays?
Most manufacturers require a minimum order to cover setup costs. For a custom retail display, you can expect this to be 200-350 units. This quantity makes production efficient for each store. This offers convenience for large rollouts to every store, store, store, and store.
Can I get a prototype before full production?
Yes, you should always request a prototype. This sample allows you to test the design and function in a real store setting. It is a critical step for successful merchandising. This provides convenience by confirming quality before you commit to the full order for every store.
Why is a store compliance checklist important?
A convenience store checklist confirms your display meets all store rules, like ADA guidelines. This step ensures a smooth installation in every store. It provides convenience for store managers and excellent customer service for every person who enters the store. This offers ultimate convenience for your store program.