3 Simple Ways to Seal Vinyl on Acrylic Keychains
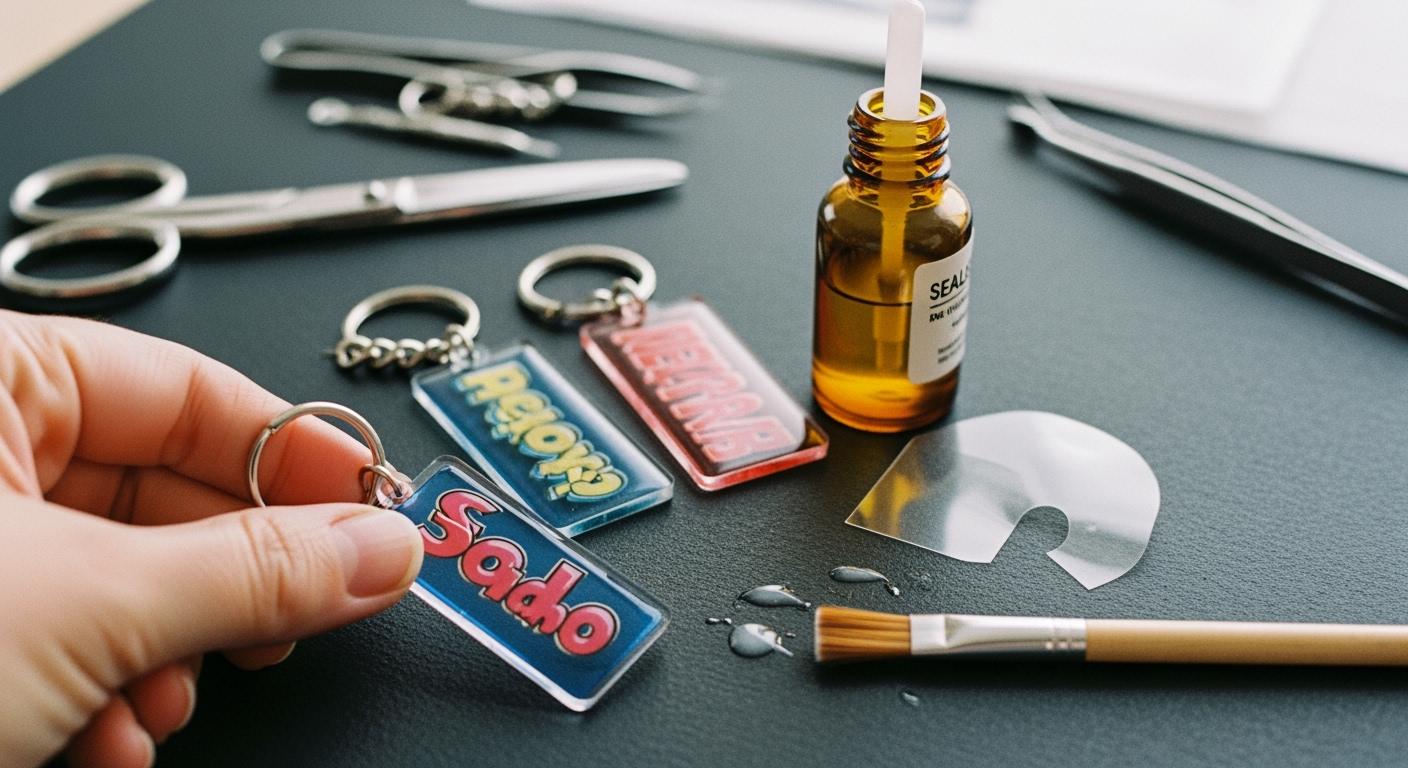
You want your acrylic keychains to look sharp and stay bright. When you seal vinyl, you protect it from peeling and fading. Try UV resin or laminate sheets for a smooth finish. Avoid spray sealers because they can cause cloudiness. These steps are easy, even if you are just starting.
How to Seal Vinyl on Acrylic Keychains
UV Resin Method
You want your acrylic keychain to look shiny and last a long time. The UV resin method gives you a strong, glass-like finish. This tutorial will walk you through each step so you can seal vinyl with confidence.
Step-by-step instructions:
Clean your acrylic blank. Wipe away dust and fingerprints.
Apply your adhesive vinyl design. Press it down well so the adhesive sticks.
Place your keychain on a silicone mat. This protects your table from drips.
Put on gloves. You do not want resin on your skin.
Wear a respirator. UV resin can give off fumes.
Squeeze a small amount of uv resin onto the vinyl. Use a toothpick or silicone brush to spread it evenly. Try to cover the whole surface in a thin layer.
Pop any bubbles with a heat gun or a toothpick.
Cure uv resin under a UV lamp. Most lamps need 2-5 minutes. Check the instructions on your resin bottle.
Let the keychain cool. Touch the surface to make sure it feels hard and smooth.
Tip: Work in a well-ventilated area. Always protect your hands and workspace.
Sealing with uv resin helps prevent moisture from getting in. Your adhesive vinyl will not fade or peel. You get a professional finish that lasts.
Laminate Sheet Method
If you want a quick and mess-free way to seal vinyl, try laminate sheets. This method works well for beginners and gives you a smooth, clear finish. Follow this tutorial for best results.
Instructions:
Start with a clean acrylic blank. Stick your adhesive vinyl design in place.
Cut a piece of laminate sheet a little bigger than your keychain.
Peel off the backing from the laminate sheet.
Place the sticky side over your adhesive vinyl. Start at one edge and press down slowly.
Use a brayer or a credit card to burnish the adhesive. Push out any bubbles as you go.
For extra bubble control, apply glue in an X form before the laminate. This helps keep the center smooth.
Trim the extra laminate with scissors or a craft knife.
Press the edges down well so the adhesive sticks.
Note: 3M adhesive sheets work great. They do not ooze or need drying time. You get a clear finish every time.
Laminate sheets seal vinyl and protect your design from scratches and water. Your diy acrylic key chain will look neat and last longer.
Why Not Use Spray Sealers
You might think spray sealers like clear spray paint or Mod Podge are easy ways to seal vinyl. These products can cause problems on acrylic keychains. Here is why you should skip them:
Mod Podge can stay tacky and never fully cure. Your keychain might feel sticky.
Thick coats of Mod Podge may not dry at all. This makes the finish soft and messy.
Spray sealers can react with adhesive vinyl or acrylic. Your design could look cloudy or change color.
Some sealers do not stick well to adhesive. This can cause peeling or bubbles.
Alert: Always check if your adhesive and sealer are compatible. If not, your diy acrylic key chain could get ruined.
Sealing is optional, but it makes your keychain last longer. Sealed adhesive vinyl resists fading and peeling. Unsealed keychains can get cloudy or start to delaminate over time. If you want a professional look, seal vinyl with one of these two methods.
Material | Environmental Impact | Health Risks |
|---|---|---|
Acrylic | Not biodegradable; produces harmful PAHs when incinerated. | Contains toxic substances; exposure can lead to serious health issues including cancer. |
Stainless Steel | 100% recyclable; does not produce toxic runoff. | Generally considered safe; minimal health risks associated with handling. |
UV Curable Inks | Less harmful to the environment than acrylic but still derived from crude oil products. | Hazardous to humans; can cause skin and eye damage upon contact. |
Choose the method that fits your project and comfort level. If you use permanent adhesive vinyl, sealing adds extra protection. Try these steps and see how easy it is to make your diy acrylic key chain look amazing.
Tips, Troubleshooting, and Comparison
Common Mistakes and Fixes
When you start making your own key chain, you might run into a few bumps. Here are some common issues you might see with your acrylic keychain and how you can fix them:
Bubbles under the vinyl designs: Use a brayer or credit card to press out air as you apply the vinyl design to your acrylic blank.
Lifting edges or peeling: Make sure you press down the permanent vinyl well. If you notice peeling, try sealing again with a thin layer of UV resin or a laminate sheet.
Cloudiness: Avoid spray sealers. Stick with UV resin or laminate sheets for a clear finish on your diy acrylic key chain.
Tip: Always clean your acrylic blank before you apply the vinyl design. This helps your design stick better and last longer.
Durability and Finish Comparison
You want your diy acrylic key chain to look sharp and last. Here’s a quick look at how UV resin and laminate sheets compare for sealing vinyl designs on acrylic blanks:
Feature | UV Resin Finish | Laminate Sheet Finish |
|---|---|---|
Durability | Very high, resists scratches and water | Good, but can scratch over time |
Gloss/Depth | Shiny, 3D dome effect | Flat, clear surface |
Color Accuracy | Slight tint possible | True to original design |
Bubble Risk | Possible, but fixable | Low if applied slowly |
Time to Complete | Longer (needs curing) | Quick (under 10 minutes) |
Skill Level | Takes practice | Beginner-friendly |
Choosing the Best Method for Your DIY Acrylic Key Chain
Think about your project before you choose a method. If you want a super glossy, durable finish for a personalized acrylic keychain, UV resin is a great pick. If you want something fast and easy for making your own key chain, laminate sheets work well, especially if you’re new to diy acrylic key chain crafts. Always use permanent vinyl for your vinyl designs so your design stays put. Remember to personalize your acrylic blank and apply the vinyl design carefully for the best results. If you want to make a bunch of diy acrylic key chain gifts, laminate sheets let you decorate many acrylic blanks quickly.
Note: Store your finished acrylic keychain in a cool, dark place and handle it gently to keep your design looking fresh.
You have three ways to seal your vinyl: UV resin, laminate sheets, and spray sealant. Each has its perks.
UV resin gives you a shiny, tough finish.
Laminate sheets work fast and look neat.
Spray sealant is the easiest for beginners.
Try one and share your favorite!
FAQ
Can I use regular vinyl instead of permanent vinyl?
You should use permanent vinyl. Regular vinyl can peel off your acrylic keychain. Permanent vinyl sticks better and lasts longer.
How do I fix bubbles under the laminate sheet?
Try this:
Use a credit card to press out bubbles.
Work from the center to the edge.
Go slow for best results.
Do I need a special UV lamp for resin?
You do not need a fancy lamp. A basic UV nail lamp works well. Just follow the resin instructions for curing time.